Thursday, December 31, 2009

Moong dal

We visited Jon's family in Rhode Island and New York for Christmas, and we got back a couple days ago. I made this for lunch yesterday before we went grocery shopping. It's mostly pantry staples for us, and it came together very easily. The basic idea is from Indian Vegetarian Cooking by Sumana Ray, but I have modified the directions. She has you cook the lentils for over an hour, which I find unnecessary. It's a warming, beautifully spiced soup. I leave the whole spices in because as it sits they contribute more and more to the flavor. The cardamom pods can be eaten whole if they've been sitting in the soup for a while. They'll give you a nice burst of freshness.

Moong dal

1 cup split beans (I used a combination of urid dal and split mung beans, or moong dal)
5 cups water
2 chopped tomatoes or 2 tbsp tomato paste
1 tsp salt
1/4 tsp turmeric
1 tsp ground cumin
1 tbsp ghee (clarified butter) or vegetable oil
1/4 cup diced onion
2 bay leaves
4 cardamom pods
1 inch stick cinnamon
3/4 tsp whole cumin seeds
2 dried chiles, cut in half if you want a hotter soup

Place beans and water in a saucepan. Bring to a boil. Skim off any foam that forms. Add the tomatoes, salt, turmeric, and ground cumin and lower heat to a simmer. Cook until beans are done, about 15 minutes. While you're waiting, you can prepare the rest of the ingredients. In a small saute pan, heat the ghee or oil over medium heat. Add the onion and cook for about 4 minutes or until soft and slightly translucent. Add the rest of the ingredients and let sizzle for about a minute. Remove from heat. When the beans are done, add the ghee and spices to the lentils and stir to combine.

Inspiration pizza


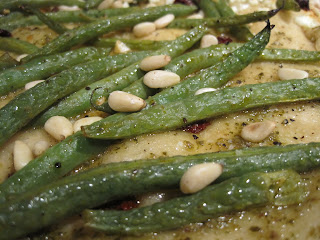
A couple weeks ago, we got home late and hungry with very little food in the house. (We were even out of parmesan-the horror!) I felt like a Chopped! contestant. We had a beer pizza crust in the fridge from a couple days before. There were also some green beans that needed to be used. I marinated them in a mixture of lemon and tangerine juice with some black pepper, smoked paprika, and chopped garlic while I rolled out the pizza dough and assembled the rest of the ingredients. I spread some extra-virgin olive oil on the dough, followed that with a hearty helping of jarred pesto. I dotted the top with sun-dried tomatoes and layered the green beans on top. I wasn't sure that the feta would be good on the pizza, so I only put it on half of it. I put it in the oven at 375 and cooked it for about 12 minutes. I sprinkled on some pine nuts and then cooked it for another few minutes. It wasn't bad at all. If I decide to make green bean pizza in the future, I will chop them smaller, but other than that it pretty much worked. The leftover green bean marinade was a nice drizzle for the top. I was impressed by my kitchen ingenuity.
I'm thinking about doing a Chopped-style weird ingredient challenge every once in a while. My idea is that Jon and I each come up with two ingredients and then we each make a dish that has all four. It's dorky, but we don't have TV or internet at home, so how else are we supposed to entertain ourselves? If these challenges ever materialize, I'll post them here.

Wednesday, December 16, 2009

Clementine Negroni

This gorgeous red-orange drink was in the December issue of Bon Appetit, and it looked so good that I even bought Campari so I could try it. It has a decent amount of sweetness from the juice, but it doesn't taste very sweet because it's balanced by the bitterness of Campari. Jon made it for me for the first time a couple weeks ago after I had a long day. I got to sit at the table doing my crossword puzzle and sipping a negroni while watching him cook me a great dinner. It is a charmed life sometimes.

Clementine Negroni
This could make two drinks, but Jon usually pours the whole thing into one glass, and I drink it slowly.

3 clementines or tangerines, peeled, or about 1/2 cup orange juice
3 dashes orange bitters or other bitters, optional
1/4 cup gin
1/4 cup Campari
3 tbsp sweet vermouth
Ice cubes
Clementine slices for garnish, optional

Muddle clementines and orange bitters in a cocktail shaker until clementines are broken down. Add alcohols and fill shaker 3/4 full with ice cubes. Shake vigorously for about 30 seconds. Strain into one or two martini glasses if you have them (wine glasses for us). Garnish with clementine slices if you're fancy like that.

Tuesday, December 15, 2009

Edamame soup

In honor of two friends visiting from San Antonio, I had people over last night for dinner. I decided to serve three soups, a salad, and homemade bread for a simple, cozy supper. The three soups I chose were butternut squash, beet, and this edamame soup. They are three of my favorite soups, and I thought they went together well. They are all pureed soups focused on a single vegetable, and the colors contrast nicely. Jon made an excellent salad, and I made some rye crescent rolls for the first time. The rolls burned slightly on the bottom, but they were still pretty good.

I had forgotten that one of our honored guests avoids dairy, but I was pleased to realize that our menu was already dairy-free, so we didn't have to change anything. It was a good reminder to me that it is very easy to make vegan soups that are flavor-packed and don't leave people feeling deprived. It was one of the easiest dinners I have had. I needed to make sure to put the ingredients in the bread machine early enough to get the rolls done on time, but other than that, I just dawdled around sipping wine and preparing three easy soups. The soups stayed warm for a while, and everyone seemed to like at least one of them. We had a total of about 2 cups of soup leftover at the end, and the salad and bread were both completely gone.

I got this soup recipe from 101 Cookbooks. Her recipe includes creme fraiche, but I have always just omitted it. I forgot to take a picture of this, but the one at the top of her page is a lot better than mine would have been anyway. This soup is very simple, and you really get the edamame flavor shining through. The potato thickens it and makes it hearty enough for a meal. Several times I have started to make the soup only to realize that I don't have as much edamame in the freezer as I thought. No worries, I just throw in some frozen lima beans or green peas to whatever edamame I have, and it's still delicious.

Edamame soup
You don't need to worry about dicing the onion or potato very small because they will be pureed. The smaller you dice them, the less time the soup has to cook, but it's not very time-intensive anyway.

1 tsp vegetable oil
1 medium onion, diced
2 medium potatoes, diced
1 quart vegetable broth
1 1/2 lbs. frozen edamame
salt to taste
chopped peanuts, optional
toasted sesame oil, optional

Saute the onion and potatoes in the oil for a few minutes, stirring often to prevent the potatoes from sticking. Pour in the broth and edamame. Bring to a boil. Lower heat to a simmer and cook until potatoes are done, about 20 minutes. Puree in a food processor or with an immersion blender. Adjust salt or just let people do it at the table. Garnish with chopped peanuts and toasted sesame oil if desired.

Tuesday, December 8, 2009

Sweet potato soup

I got the idea for this recipe from the inside of a Dannon yogurt container foil, but the foil accidentally got thrown away before I made the soup, so I had to wing it on the amounts of everything. Sweet potatoes were only $0.19/lb the week before Thanksgiving, so I bought a ton of them, and this soup was a very comforting, tasty way to use some of them.

Sweet potato soup

2 tsp vegetable oil
1 medium onion, diced (about 1 cup)
1 tsp ground cumin
2 tsp chili powder (by which I mean the spice blend containing cumin, oregano, and ground chiles)
3 medium sweet potatoes (about 10 oz each), cut into 1-inch cubes
1 qt vegetable broth
Pumpkin or squash seeds for garnish, optional
Yogurt for garnish, optional

Saute the onion in the oil until translucent. Sprinkle spices on top and saute another 30 seconds. Add sweet potatoes and broth. Bring to a boil. Reduce heat to a simmer and cook about 20 minutes, or until sweet potato is soft. Use an immersion blender to make it nice and smooth, or process it in batches in a food processor or blender. Garnish with pumpkin seeds and yogurt if desired.
Stirring the yogurt into the soup yields beautiful patterns and reminds me of a scene in "Arcadia."

Monday, December 7, 2009

Unresolved raspberry-rhubarb pie

This past Saturday was the annual Houston Sacred Harp singing. (You can read about Sacred Harp at this website.) It was snowy all day Friday, so I spent most of the day inside cooking in preparation. (Part of the Sacred Harp tradition is serving dinner on the ground to guests who have come from out of town.) This is one of the dishes I contributed. Since I had a little crust left over after putting it in the bottom of the pan, I made a treble clef and some shape notes (explained on the Sacred Harp website) out of the extra and put it on the top. I think of rhubarb as a spring or summer pie, but I had a bag of frozen rhubarb and remnants of a couple bags of frozen raspberries in my freezer, so I didn't have to go out and buy anything to make this pie. And I got a bonus of extra room in my freezer. This pie recipe won third place and "most creative" in a Pi Day pie contest last March. I made it up because one bag of rhubarb isn't quite enough fruit for the Better Homes and Gardens Cookbook rhubarb pie recipe, and I happened to have just enough raspberries in the freezer to round out the volume the first time I made it.

I call this pie unresolved because the notes I have on it, "fa, sol, la, mi" are the equivalent of "F, G, A, B" in C major, hence an unresolved leading tone. For the record, I did made two fa's, but only one would fit on the pie, and if I went down to the next line, I'd have to make another clef for it to make any sense. I didn't think about the fact that I could put the fa at the end and get "G, A, B, C" and a lovely resolution. And yes, I have spent quite a bit of time thinking about this. It's what I do.

Raspberry-rhubarb pie
1 pound frozen rhubarb (about 4 cups)
2 cups frozen raspberries
1/2 cup sugar
1/3 cup all-purpose flour
1 pie crust, made with either all-purpose or whole wheat pastry flour
splash of milk
tiny amount of sugar

Place fruit in a large bowl. Let stand for about 45 minutes, or until icy but not frozen. (During this time, you can make your pie crust if you haven't already.) Stir in sugar and flour.
Place pie crust in pie dish. Trim any overhanging edges and cut them into fun shapes if you want. Pour fruit mixture into pie crust. Arrange fun shapes on top. Brush with milk and sprinkle with sugar for extra beauty and crunch.
To prevent the edges from burning, place aluminum foil around the edges. Bake at 375 for about 50 minutes. (If using fresh fruit, only bake for 25 minutes.) Remove foil and bake for another 20-30 minutes, or until filling is bubbling at the edges and crust is golden. Cool on a wire rack.

Tuesday, December 1, 2009

Spiced Butternut with Amaretto

I had more squash than I needed for the bread pudding on Thanksgiving, so I made this up to use the extra. I like the combination of squash and Indian spices, and I added the amaretto to enhance the sweetness and give it some liquid for steaming. I ate mine on a bed of kale, but Jon preferred it on its own. He said some very nice things about it. "I can imagine getting this in an Indian restaurant and commenting about how the spices are interesting without being overpowering and how difficult that is to do at home. I really like it." I felt like a brilliant culinary goddess.

Spiced butternut with amaretto

1 tbsp vegetable oil
3/4 pound butternut squash, peeled and cut into 1/2-inch cubes
1/4 cup onion, diced
1 tsp garam masala
3 tbsp amaretto (or white wine or apple juice)
Salt to taste

Heat oil in a large saute pan over medium heat. Add the squash and let sit for about two minutes without stirring to try to develop a little browning. Add the onion and stir. Saute for about 2 minutes. Sprinkle the garam masala over the top and stir to combine. Add the amaretto all at once and quickly put the lid on the pot for maximum steaming. Turn down the heat to medium-low and let steam for about ten minutes or until squash is soft enough for you. Stir once or twice during this time. Remove from heat, and add salt to taste at the table.

Monday, November 30, 2009

Moroccan-spiced olives

This is an easy way to jazz up jarred olives. They are nice as a little appetizer before dinner, especially if you're making other Mediterranean foods that night. Jon likes them even more than he likes garlic-stuffed olives, which is saying a lot. We often had olives spiced with fennel as an appetizer in France, but I got this particular spice blend from a Moroccan cookbook by Rebo Publishers. I omitted the garlic because I thought it would be too assertive and overpower the lovely spices.
Moroccan-spiced olives

1 tbsp extra-virgin olive oil
1 tsp whole cumin seeds
1 tsp whole fennel seeds
1 tsp whole coriander seeds
1/4 tsp ground cardamom
Pinch ground nutmeg
Pinch ground cinnamon
1 1/2 cups green olives
1 tbsp lemon juice
1 tbsp orange juice

Heat the olive oil, cumin, fennel, coriander, cardamom, nutmeg, and cinnamon in a saucepan over medium heat for about two minutes. The spices should be quite fragrant. Remove the pan from heat, add olives, and toss to coat. Stir in the lemon juice and orange juice. Refrigerate in an airtight container (like the jar the olives came from in the first place) for at least four hours before serving to let the flavors meld. These are best if served room temperature. When you've eaten all the olives, Jon says the leftover spiced olive/citrus juice is a good dipping sauce for bread.

Wednesday, November 25, 2009

Butternut-kale bread pudding

This was in Orangette's column in the November issue of Bon Appetit, and it will be on our Thanksgiving table. It is autumnal and indulgent and kaley. The first time we tried the recipe, we forgot the salt, and it wasn't very good. It's amazing what a difference a little salt makes. The second time we tried it, it was fabulous. I love the way the kale on the top dries out and gets a little chewy. This recipe has six eggs, a bunch of half and half, and a ton of cheese, so I wouldn't recommend it for everyday eating, but it's perfect for a food-centric holiday when you want to be a little naughty and undo the top button of your pants.
Butternut-kale bread pudding
I made a couple small changes to the original recipe. They are reflected below.

2 lbs butternut squash, peeled, seeded, and cut into 1-inch pieces
3 tbsp olive oil (not extra-virgin), divided
1 1/2 tsp kosher salt, plus extra for sprinkling
7 eggs
2 1/4 cups half and half
6 tbsp dry white wine
1 tbsp Dijon mustard
1 day-old baguette, crusts intact, torn or sliced into 1-inch pieces (get the grocery store to slice it for you to save some time and effort)
1 cup chopped onion
1 lb kale, stems removed and leaves coarsely chopped
5 oz extra-sharp cheddar, grated

Heat oven to 400 F. Place squash in a large baking pan, drizzle with 1 tbsp oil, and sprinkle with salt. Roast for about 20 minutes or until squash is soft, stirring occasionally.

In a large mixing bowl, whisk together eggs, half and half, wine mustard, and salt. Gently stir bread into mixture and let it soak for about 30 minutes, turning once or twice.

Saute onion in 2 tbsp oil over medium heat until translucent. Add kale, cover, and cook just a couple minutes, until kale is bright green but slightly wilted. Set aside.

After the squash comes out of the oven, reduce temperature to 350 F. Butter or oil 9"x13" baking dish thoroughly. (I use the same dish for the squash as for the final product, and I oil it in between.) Place about half the bread mixture on the bottom. Spoon about half the kale over it, top that with half the squash, and then cover with half the cheese. Repeat with the remaining bread, kale, squash, and cheese, pouring any leftover egg mixture over the top. Cover the pan with foil and bake for 20 minutes. Remove the foil and bake for another 20 minutes or until custard is set and feels a little springy. If exploding Pyrex hasn't scarred you for life, turn on the broiler and broil it for 2 minutes to get the cheese nice and brown. Let cool for five minutes before serving.

Thursday, November 19, 2009

Roasted broccoli with raisin vinaigrette

This is the first recipe we ever tried from Bon Appetit. We had always just had broccoli steamed with some cheese or salt and pepper, but roasting it and serving with this vinaigrette are now our standard. I think I'm pretty good at making up new recipes and having a feel for what flavors go well together, but I never would have thought of raisins, vinegar, and cumin as a good idea. I was very pleased when they turned out so good. The vinaigrette is pretty thick, not runny, so it's easier to dip into it than to serve it on top. This makes more vinaigrette than we usually use on one recipe of roasted broccoli, but it keeps forever in the fridge.

Roasted broccoli with raisin vinaigrette

1 1/2 pounds broccoli, cut into whatever size you like broccoli to be cut into
Olive oil for roasting

3 tbsp extra-virgin olive oil
2 tbsp sherry vinegar or red wine vinegar
1/2 cup raisins
1 tbsp water
1/2 tsp ground cumin

Heat the oven to 400F. Put the broccoli on a baking sheet or casserole dish. Drizzle with olive oil and toss to coat. Roast until tender and browl in spots, between 15 and 25 minutes. To make the dressing, put all the ingredients in a small food processor or blender. Process or blend until smooth. Toss the broccoli with the vinaigrette or serve it on the side.

Monday, November 16, 2009

Rice salad

Here is a rice and bean and avocado and tomato and other stuff salad that I have made a couple of times. Ev claims to like it.... I am dubious. Next time we will make it with brown rice. We think it will be even better that way.

1 Avocado chunked
2/3 cup black beans
1/4 cup cilantro or parsley, chopped
1 tomato diced
1 cup rice

Cook the rice. Let cool. Add tomato, avocado, black beans and cilantro or parsley.

2 limes
2 Tbsp extra virgin olive oil
1/2 tsp smoked paprika
1/2 tsp coriander
salt
pepper

Add dressing to salad and mix well, trying not to mash the avocado and tomato pieces.

Friday, November 13, 2009

Bulgur Texas Chili

I found this recipe perusing the "food in a bowl" tag on Molly's blog a few weeks ago. I'm a Texan, but I never knew that our chili isn't supposed to have beans. (My mom is from Ohio, so I didn't grow up eating particularly Texan foods.) All the chilis I've ever made were bean-based, so I was glad to expand my horizons with this bean-free recipe. I've tried using bulgur in chili before, and it was pretty disappointing. I think there wasn't enough in the recipe, so it was just an occasional textural oddity. This chili is chock-full of bulgur, and it definitely doesn't taste or feel like meat, but it gives the chili a really good chew. I omitted the cayenne pepper in the recipe, but it was still kind of spicy for wimpy me. (Jon, of course, added hot sauce to his.) Other than that, both of us really enjoyed this chili, and I'll just use a little less chili powder, or a milder chili powder, next time. We served it over cornbread. If it had lasted longer, I would have liked to try it in Frito pie, but it was gone too quickly. I hear that Molly is entering this chili in a vegetarian chili cook-off in Austin this Sunday. Check it out if you're in the area, and good luck, Molly!

Bulgur Texas Chili

1 or 2 tablespoons oil
small onion, chopped
2 garlic cloves, chopped
salt and pepper
1 teaspoon oregano
1 teaspoon cumin
1/2 teaspoon paprika
1/2 teaspoon cayenne (optional)
1/2 tablespoon chili powder
1/2 cup bulgur
3 1/2 teaspoons soy sauce
1 tablespoon ketchup
1 can rotel (I used mild)
1 can water
2 tablespoons tomato paste

Fry the onions in oil until they are soft, about five minutes. Add the garlic and cook another 30 seconds. Add all the spices and stir to combine. You can leave out the cayenne to reduce the heat a bit. Add the bulgur and stir everything together again. Combine the soy sauce and ketchup and pour the mixture over the bulgur. Stir continuously until combined.

Pour in the can of rotel (or about 10 ounces diced tomatoes). Fill the can with water once and add to the other ingredients. Add the tomato paste and stir everything once more. Bring everything to a boil and then turn the heat down to a simmer. Simmer covered for 20 minutes.

Taste and adjust the seasonings. If the chili is too dry for your taste, add some water. Serve over Fritos, cornbread, or tortilla chips. It's OK with me if you serve it over rice, but Molly disagrees.

Wednesday, November 11, 2009

Eggplant Salad II

Here is a little eggplant salad I made yesterday after a dry run the week before. I initially planned for it to be a cold salad, but Ev found it a little slimy, so now it will be served warm and over rice.

1 large eggplant (about 1 1/2 lbs?)
1 red pepper
salt
oil

Slice the eggplant into about 1/2 to 1 inch slices. Liberally salt the slices and let sit for about 1/2 hour. Rinse eggplant and cube the slices. Slice red peppers and put in an oven safe dish, oil and put in the oven at 400 for about 25 minutes or until done. I stirred every 8 minutes or so.

2 Tbsp soy
1 Tsp honey
3 inches ginger finely diced
2 scallions sliced
2 Tbsp fresh basil

Combine the above ingredients. Pour about half over the finished eggplant mixture. The rest is for putting over at the table if you want more. Serve over rice (jasmine is nice) and maybe garnish with basil.

Tuesday, November 10, 2009

Buckwheat galettes

First, a crepe vocabulary lesson. In France, if it's made with wheat, it's filled with something sweet and called a crepe. If it's made with buckwheat, it's filled with something savory and called a galette. So really, "buckwheat galette" is redundant. But we don't live in France, so I'm calling them that anyway. Vegetarian Times had a buckwheat galette recipe in their September issue, and since we had some really fantastic galettes in Brittany in July, we wanted to try to recreate the experience. The recipe worked really well, and we will definitely be making it a lot. The buckwheat has a very distinctive, savory, nutty flavor we love. It's also a lot more interesting texturally than plain wheat crepes. The only drawback to this recipe is that you have to let the batter rest for 12-24 hours before you can make the crepes, so it does require some planning. We usually do menu planning for the week every Saturday or Sunday, so we always know to whip up the batter the day before.

You can fill these with anything savory. Sometimes I just melt some cheese on them and fold them up. They're a great substrate for beet salad. When we serve them that way, we melt the blue cheese a little before adding the other ingredients and leave them open-faced. I also really love filling them with melted cheese, sauteed greens, and a little black pepper. Add a fried egg on top and you have a very hearty, yummy breakfast.
Buckwheat galettes (from Vegetarian Times)
They claim it makes 8, but it made 12 the one time I actually counted them.

1 1/2 cups buckwheat flour
1 1/2 tsp salt
1 large egg
1 tsp honey

Whisk together flour and salt in a large mixing bowl. In a medium mixing bowl, beat egg and honey with 2 cups of cold water. Using an electric mixer, beat egg mixture into flour mixture until batter is smooth. Beat 6 to 10 minutes, or until batter is light and thickened slightly. (I don't know why we do this step or if it is actually necessary, but the recipe works well as is, so I haven't messed with it.) Cover with plastic wrap and refrigerate 12-24 hours.

The next day, whisk 1/2-1 cup (I always use 1/2 cup) water unto the chilled galette batter to thin. Heat a nonstick crepe pan over medium heat. I don't have to grease mine at all, but you probably know if you do, so grease it lightly with butter or vegetable oil if necessary. When skillet is hot, pour 1/3 cup batter into the skillet, lifting and turning the pan so the batter coats the bottom. Cook 2-3 minutes, until edges begin to brown and center is brown. You will usually get little bubbles coming up. They're fun to look at. Remove from skillet with a spatula or your fingers and make the next crepe. Before you do that, you might want to melt some cheese on top. If you want dinner to be warm and on the table all at the same time, you can put the cooked crepes in a warm (200 F) oven until you've made them all. Store any extras in the fridge for a few days. They might crack a little when you get them out to reheat and fill them, but they'll still be tasty.

Monday, November 9, 2009

Easy pie or quiche crust

As Jon said in his last post, we have been eating a lot of quiche lately. We used to buy frozen pie crusts, for them but I decided that it would be nice to try making my own. I've pretty much gotten the hang of it now, and I think it's easier to take ten minutes to whip this up than go to the store and buy one. Plus it's way cheaper. This is definitely not extravagant, flaky, to-die-for crust, but it is suitable for our needs, and it tastes better to me than what you can get in the freezer section. I have tried to make pie crusts with butter, and they always end up soggy or too soft. Shortening works well for me.

Pie crust (from the Better Homes and Gardens Cookbook)

1 1/4 cups all-purpose or whole wheat pastry flour
1/4 tsp salt
1/3 cup shortening
ice water

Combine flour and salt in a large mixing bowl. Using a pastry cutter or two knives held scissors-fashion, cut the shortening into the flour until the mixture resembles fine breadcrumbs. Sprinkle 1-2 tbsp water over the flour mixture and stir together with a fork. Add more water until the mixture is completely moistened. Roll dough into a ball and roll it out on a floured surface. Or you can wrap the dough tightly in plastic wrap and keep it in the fridge until you need it.

Mushroom quiche

I have been on a bit of a quiche kick lately. Some have turned out well and others a little less so. For instance the asparagus quiche I made was fine, but I would rather have some asparagus with an egg. However, my latest quiche turned out well. Next time I may try a different cheese (blue and emmentaler both sound good).

3 small portobello mushrooms thinly sliced
6 white mushrooms thinly sliced
1 Tsp dried rosemary
some salt
oil for sauteing

Heat oil in pan. Add sliced mushrooms and liberally salt them. Cook until the mushrooms start to give up their juices. Add rosemary and continue sauteing until the liquid has cooked off and they are done.

1/2 small onion finely diced

Saute.

3 eggs
1/2 cup milk
1/2 cup cream
3 0z. Fontina cheese thinly sliced then cubed
1 oz. grated Romano
1 Tsp fresh rosemary

Break and beat eggs. Add cream, milk and rosemary. Beat together. Add cheese, mushrooms and onions. Pour into prepared quiche crust (the crust I used was baked 8 min with aluminum foil and pie weights, then 3-5 minutes with no foil or weights, all on 375) and bake for 25 minutes at 375. Let cool a bit and serve.

Like most (all?) quiche, this is good with a nice salad!

Monday, November 2, 2009

Pasta salad

Here is a neat little pasta salad I made a week or so ago. If I were to do it again I would leave out the olives. Also some pesto might be nice in it.

12 oz Orzo
2 roasted red peppers diced
8 olives chopped
1/4 cup fresh basil (loose) chopped
1/4 cup fresh parsley chopped
2 Tbsp pine nuts
3 Tbsp Olive oil
1 Tbsp Balsamic vinegar
Romano Cheese grated
salt
pepper

Cook the Orzo as usual (or maybe leave a bit more al dente). Mix oil, vinegar and basil. Mix the red peppers, olives, pine nuts and parsley. Dress with oil and basil. Add cheese, salt and pepper to taste.

Friday, October 30, 2009

Inspiration soup II

After my last batch of chickpeas, I had a ton of chickpea cooking water, so I decided to make an inspiration soup. It was a cold and rainy day, so I wanted something hearty and comforting. Instead of the vaguely Indian spice route I usually take, I decided to go Italian with some rosemary and Italian seasoning blend. I may have overdone it a little on the rosemary, but it was pretty good. I had a gorgeous bunch of Swiss chard to use, and of course some chickpeas. I also wanted something starchy. I decided on some "rice stick" noodles I had in the pantry because I didn't really feel like potatoes, and I didn't have much in the way of regular pasta. I think the rice noodles were perfect. They soaked up the broth flavors very nicely. My chard had pink stems, and the color leached out into the broth, giving it a gorgeous warm oragey hue. I think the carrot helped with that too.

I'll be busy most of the day tomorrow, so this is my last vegan month of food post. It was fun to eat a little more vegan for the month and learn a little bit about some vegan foods I had never tried before. I definitely ate fewer eggs and dairy products because of the theme this month, which was probably good for me and the earth.

Inspiration soup

1 tbsp vegetable oil
1/3 cup chopped onion
1 garlic clove, minced or pressed
1 carrot, diced
1 bunch Swiss chard, stems and leaves separated, stems diced, leaves cut into thin strips
1 tsp dried rosemary
1 tsp Italian seasoning (blend of thyme, oregano, basil, etc.)
2 quarts chickpea cooking water
1 tsp salt
1 cup cooked chickpeas
4 oz. rice stick noodles

Saute onion, garlic, carrot, and Swiss chard stems in the oil for about five minutes. Add spices and stir briefly. Add chickpea water, salt, and chickpeas. Bring to a boil. Add the noodles. When the noodles are almost soft enough for you, add the Swiss chard leaves. They will wilt very quickly. Stir through, make sure the noodles are cooked to the consistency you like, and serve. You might want to add a little salt at the table.

Thursday, October 29, 2009

Pineapple peanut butter stew with millet

It sounds odd, but pineapple and peanut butter are both good in savory dishes. I've seen several versions of peanut or groundnut stew, but this is the only one I've seen that (brilliantly) adds pineapple. This is a recipe I got from Moosewood Restaurant Cooks at Home, and I think it was my first exposure to kale. You can use any green in it, but kale keeps a lot of texture when cooked, which is nice in this dish. I think millet is the perfect grain for this dish, but couscous and rice are good too. This recipe makes 2-4 hearty servings, depending on how big the bunch of greens is.

Pineapple peanut butter stew (from Moosewood Restaurant Cooks at Home)
Pineapple tidbits are best for this, but crushed pineapple or pineapple chunks are perfectly acceptable. You want pineapple that is packed in pineapple juice, not sugary syrup. Fresh pineapple would be great, I'm sure, but if I've gone to the trouble of disassembling a pineapple, I'm not about to cook it in a stew.

1 cup hulled millet

1 tbsp vegetable oil
1 cup chopped onion
2 garlic cloves, minced or pressed
2 cups undrained canned pineapple (20 oz. can)
1 bunch greens, washed and sliced (5 cups or more)
1/2 cup peanut butter
Tabasco sauce to taste (1 tsp or more)
Salt
Cilantro, chopped, for garnish
Crushed peanuts, for garnish

Combine millet, 1 3/4 cups water, and a large pinch of salt in a small saucepan. Bring to a boil, reduce heat to a simmer, and cook for about 20 minutes, or until water is gone. If it's still a bit crunchy, add a couple tablespoons of water at a time and cook until tender enough.

In a large pot, saute onion and garlic in oil for about 10 minutes, or until the onions are lightly browned. Add the pineapple and its juice to the onions and bring to a simmer. Stir in the greens, cover, and simmer for about 5 minutes, stirring a few times, until greens are wilted. Mix in the peanut butter and Tabasco sauce and simmer for 5 minutes. Add salt to taste. Garnish with cilantro and crushed peanuts if desired.

Tuesday, October 27, 2009

Stuffed Peppers

I love vegetables stuffed with stuff. It just seems fancy to go to the trouble of sticking food into food. Here is a recipe for stuffed peppers that I tried a few weeks ago on experimental Indian night.

4 green bell peppers, about 1 inch of tops cut off and saved, seeds and pith removed

1 tsp vegetable oil
1/2 onion, diced
1 tomato, diced
1/2 tsp curry powder
1/4 tsp cumin
1/4 tsp turmeric
a bit of coriander, cayenne, garlic powder, salt and pepper
2 cups basmati rice, cooked
2/3 cup French lentils, cooked

Bake peppers at 350 F for 20 minutes before stuffing.
In the meantime, saute the onions. When soft add in diced tomato and seasoning. Saute for 5 minutes. Add rice and lentis and mix well, cooking for 2 minutes. Stuff peppers with filling. Bake until the pepper skins start to wrinkle and char.

Deconstructed hummus

This post has three parts. In the first, I wax poetic about bulk spices. In the second, I wax poetic about dry chickpeas. In the third I give you a recipe.

The Central Market near me recently (past six months or so) started selling bulk spices. Oh my goodness, it's awesome. I have often read that buying spices in bulk was the way to go, but there weren't many places for me to do that. I could get a few things in gigantic bags from Indian, Middle Eastern, and Chinese grocery stores, but while I saved in the unit price, I had to get a lot at one time. Now I can get exotic spices tablespoons (and cents) at a time, saving me money and storage space and keeping my spices fresher. Combined with my recent acquisition of a spice grinder, I lead a charmed life.

Since I love listening to Saturday morning radio (Car Talk, Wait Wait, and even the insufferable twits on Says You) and have an HD radio in the kitchen, I like to have cooking projects on Saturday morning. This past Saturday, I made a batch of granola and cooked up a pound of chickpeas I had soaked overnight. I am always amazed at how cheaply I can make food from dry beans. I can buy a pound of dried chickpeas for 99 cents at my Fiesta. Cooked, that's about six and a half cups. I made two cups of the chickpea salad below and used two cups in Mark Bittman's roasted chickpea dish. (It's quite nice, and I might post it on here later once I play with it a little more.) I had two cups leftover. Some have gone on salads, and I used some in a delicious "inspiration soup" last night. I probably have about a cup of chickpeas still left in the fridge. I saved the cooking liquid and used it as the base of the soup. All those recipes for under a dollar's worth of chickpeas! It's great. Canned chickpeas are also quite cheap compared to meat or restaurant food, but the dried ones are unbeatable.

Deconstructed hummus

2 cups cooked chickpeas
Juice of 1/2 lemon (about 1 tbsp)
1 tbsp extra-virgin olive oil
1 1/2 tbsp za'atar (to make your own, see next recipe)
Salt to taste

Combine ingredients and adjust seasoning to taste. I wanted to let you know whether it was better the next day, but Jon ate it all before I had a chance. It was really good.

Za'atar (from How to Cook Everything Vegetarian by Mark Bittman)
1/4 cup sesame seeds
2 tbsp dried thyme
2 tbsp sumac

Toast the sesame seeds in a toaster oven or a dry skillet until golden. Allow to cool. Combine spices.

Monday, October 26, 2009

My first tofu scramble

Hooray, I have met another goal of vegan month: I have now made a tofu scramble. I based it on this recipe, suggested by mollyjade. It contains nutritional yeast, which I had never used before. I don't know exactly what it contributed to the taste, but the scramble was definitely very savory and good. I enjoy egg scrambles at breakfast, and I can definitely see myself doing some tofu scrambles instead. Next time, I will add more vegetables because my preferred tofu brand (aka the cheapest one at Fiesta) comes in 1-pound containers, and that's a lot of tofu. I might also omit the lime juice. I found the sourness a little odd. Below is the scramble exactly as I made it this morning. My tofu expired several months ago, so it had dried out somewhat and I didn't have to drain or press it. If you are more punctual about eating your tofu, you might want to press it or drain it on towels.

Tofu scramble
This made two hearty helpings, and we had about one cup left over.

2 tsp vegetable oil
1/4 cup chopped onion
1/4 cup chopped red bell pepper
2 Swiss chard leaves, stems separated from green parts, both chopped
1 tsp ground cumin
1 tsp dried thyme
1 tsp ground smoked paprika
1/2 tsp ground turmeric
1/2 tsp salt
1 lb tofu, crumbled
juice of 1/2 lime
1/4 cup nutritional yeast
whole cumin seeds for garnish, optional

Saute the onion, red pepper, and chard stems in the oil for about 3 minutes, or until soft. Add the spices and stir. Deglaze the pan with about 1/4 cup water. Stir in the tofu and cook for about 7 minutes. Add the chard leaves and cook until wilted, about 3 more minutes. Stir in the lime juice and nutritional yeast. Garnish with cumin seeds if desired.

Wednesday, October 21, 2009

Eggplant Salad

Here is an eggplant salad from the Moosewood New Classics cookbook. It is really good plus it is a pleasant way to eat eggplant on a hot summer day.

5 cups peeled eggplant (in 1 inch cubes)
2 Tbsp vegetable oil
1/2 large cucumber (peeled)
1 pepper
2 tomatoes
2 scallions

Bake the cubed eggplant on 450 for about 25 minutes stirring every 10 minutes. The should be soft and diminished when the are done. Slice the scallion, cucumber, tomatoes and pepper.

Prepare marinade:
1/4 cup lime juice
1 Tbsp lime zest
3 Tbsp vegetable oil
2 Tbsp grated fresh ginger
2 Tbsp fish or soy sauce
1 or 2 Tbsp fresh mint
1/4 cup chopped Thai basil
2 Tbsp chopped cilantro
chili to taste

Whisk marinade and add to eggplant. Let sit for a bit (they say an hour). Combine with the salad. We like to serve this with noodles (say rice noodles or vermicelli). In this form I find it can be a meal (though you may want to add some tofu for protein). It can be good with a bit more eggplant (which is the star) and marinade.

Enjoy!

Tuesday, October 20, 2009

Roasted root vegetables with fennel spice blend

My sister gave me a coffee grinder for my birthday so I could use it as a spice grinder. I had always relied on pre-ground spices before, including a lot of pre-mixed spice blends. Now that I have the spice grinder, I feel free to make whatever exotic spice blends I want. This month's Vegetarian Times had an interesting-looking fennel spice blend, so I made it, and now I'm trying to use it in a bunch of different stuff. It was OK but not great in hummus and pretty good sprinkled on roasted butternut squash seeds, but it was perfect with this vegetable roast.

The vegetables themselves were pretty exciting. We used a total of seven different vegetables. Five of them were new to me in cooking, although I have probably eaten them before. Instead of the usual sweet potatoes, we used a garnet yam and a Japanese sweet potato (at least that's what Central Market called them). The Japanese sweet potato had deep maroon skin but a white interior. It was stickier than regular potato or sweet potato when cooked.
Japanese sweet potato on the left, garnet yam on the right
I am looking forward to doing a potato and sweet potato roast with Japanese sweet potatoes and normal new potatoes. I think the contrast in texture and flavor would be neat since there wouldn't be a color contrast. The other new to me root vegetables were celery root, turnip, and rutabaga. The celery root was pretty neat. I only used half of it and plan on trying remoulade with the other half. The rutabaga and turnip mostly provided contrast. This dish took a lot of scrubbing and chopping, but other than that it was really easy. Next time I might start cooking the celery root before the other vegetables. It was still a bit crunchy when the other ones were done, but we didn't mind the textural contrast. We served this with a beautiful salad made by Jon and corn chowder I made while the veggies were roasting. That recipe should be posted here soon.

Roasted root vegetables with fennel spice blend
Of course, you can vary the roots as desired. I think we had about 8 cups total.

1 garnet yam
1 Japanese sweet potato
1/2 of a large celery root, peel removed (This is a bit annoying. Just accept that you'll lose some of the root and use a sharp knife to cut the peel away as best you can.)
2 carrots, peeled
3 beets, greens and "tails" cut off
1 turnip, peeled
1 rutabaga, peeled
1 tsp olive oil (not extra-virgin)
1/2 tsp salt
1 1/2 tsp fennel spice blend (see next recipe)

Preheat oven to 400 F. Thoroughly wash and scrub all the vegetables that aren't peeled. Cut everything into 1 1/2-inch-ish chunks. Place all vegetables in a large baking pan. Mine was 13x9x2. Drizzle with olive oil and toss to coat thoroughly, adding a little more if necessary. Sprinkle with salt and fennel spice blend. Bake until vegetables are tender, about 45 minutes, stirring every 15 minutes. Sprinkle with more salt and fennel blend at the table if desired.

Fennel spice blend (from Vegetarian times)
If you don't have a spice grinder, you can use the same amounts of pre-ground spices instead.

1/4 cup whole fennel seeds
2 tsp whole coriander seeds
1/2 tsp whole peppercorns
1/2 tsp cinnamon
1/4 tsp paprika, either smoked or regular

Toast fennel seeds, coriander, and peppercorns in a dry skillet on medium heat for 2-3 minutes or until they are very fragrant and maybe have gotten a little golden. Put aside to cool. When they are cool, grind them with a mortar and pestle or spice grinder until they are just short of completely powdered. Stir in the cinnamon and paprika. Store in a resealable baggie or rinsed-out spice jar.

Monday, October 19, 2009

Veganized Banana Bran Bread

My first experiment with veganization was a resounding success! I have never veganized an already-vegetarian recipe before, but one of my goals this month was to try some simple substitutions, and this one worked very well. About two weeks ago I made the standard recipe for Jeanne Lemlin's banana bran bread from Vegetarian Classics. It was a great bread. It is less sweet than standard banana bread, and the bran gives it a nice chewiness. Both aspects make it more breakfasty and less desserty than normal banana bread. As written, the recipe contains eggs and melted butter. I made it as written first to make sure it was a good recipe before I started messing with things. In the vegan version, which I made last week, I used flax seeds mixed with water in place of the eggs and vegetable oil in place of the butter. I was worried that my naive substitutions would mess up the chemistry completely, but when it came out of the oven, it was great. I didn't have a piece of the first batch to compare it to, but it didn't seem to suffer at all from being veganized. Hooray! I look forward to using the flax-egg substitution in the future. Flax has a lot of fiber and omega-3's and is much lower in calories than eggs, so it is a good healthy alternative.

Veganized Banana Bran Bread
You can probably substitute whole wheat pastry flour for the all-purpose flour with no problems. I was out, so I didn't.

1 cup all-purpose flour
1/2 cup wheat bran
2/3 cup sugar
1 tsp baking powder
1 tsp baking soda
1/2 tsp salt
1/2 tsp nutmeg, optional
1/2 cup chopped pecans or walnuts
2 tbsp ground flax seed mixed with 6 tbsp water
2-3 mashed ripe bananas
6 tbsp vegetable or nut oil

Preheat the oven to 350 F. Use shortening or oil to greast a 9x5-inch loaf pan. In a large bowl, combine the dry ingredients and mix. In a medium bowl mix together the flax mixture, bananas, and oil. Scrape into the flour mixture and stir just to combine. Pour into the prepared pan.
Bake for 50 minutes, or until a knife inserted in the center of the loaf comes out clean. Cool on a wire rack for 10 minutes before removing from the pan. If you have superhuman self-control, cool completely before slicing.

Saturday, October 17, 2009

Quinoa salad with peas and pine nuts

This dish has four ingredients (five if you count water), and I don't think it could be improved. I intended to dress it with sesame-lemon dressing, but it was so darn good without it that I left it alone. Later I did try it dressed, and it was not nearly as good. The pine nuts are so rich and toasty that the dressing just seems sharp and unnecessary. Jon says I should call this a salad, but I think the pine nuts make it somewhat pilaf-y as well. I could definitely see this served in a butternut or acorn squash for an attractive Thanksgiving treat.

It's funny, I normally have quinoa in the pantry, but I don't actually cook it very often. This week, I've made it three times, and now it's all gone. I guess making it the first time just reminded me how good it was, so I made it some more. I think quinoa is a really good dish to take in for lunch if you don't have leftovers handy. The quinoa itself only takes about 20 minutes to cook, and while it's cooking, you can prep whatever veggies, beans, or nuts you want. You have a healthy, tasty lunch in just 20 minutes.

Quinoa salad with peas and pine nuts

1/4 cup pine nuts
3/4 cups quinoa (I used a mix of white and red)
generous pinch of salt
1 cup frozen peas

First, toast the pine nuts. I spread them out on a tray in the toaster oven and click "toast" and take them out the moment I can see that they've started to brown. You can also toast them in a dry skillet over medium heat. Set aside to cool.
Combine quinoa with 1 1/2 cups water and a large pinch of salt in a medium saucepan. Bring to a boil, then turn down the heat and simmer for about 20 minutes or until all the water has been absorbed. Stir in the peas and pine nuts. It's OK if the peas are still frozen. The heat from the quinoa will defrost them, and they'll bring the temperature of the quinoa down so you can eat it sooner. Serve warm or room temperature, not cold.

Thursday, October 15, 2009

Thinning

My new veggies have started to sprout! I have kale, broccoli, beet, and carrot shoots out the wazoo. Of course, I am very excited, but it also means it's time to thin. Not my favorite. I know that the plants need space to grow, but I feel so bad about pulling up my babies. The carrots are going to be the worst because I had a little spill while I was planting them and ended sowing way more than I had intended. The various websites I've consulted differ, but I think I need to go to a spacing of at least 1/2" now, and I'll need to thin them a little more in a few weeks. I have already thinned the beets a little, but I'll need to thin more soon. I haven't touched the kale or broccoli yet. I will probably thin them to 4" now and a little more in a few weeks. I was going to do it last night, but I lost the nerve. At least the sprouts are tasty, so all is not lost. The kale and broccoli sprouts have a distinct broccoli taste, and the carrot sprouts have a carrot flavor without the sweetness. Like the flavor of an overgrown, bitter carrot. But also a lot of grassiness. It's neat. The beet sprouts don't taste like much, but they're bright pink, so that's neat. Now I'll leave you with a few other garden pictures taken with my new camera.

This is a volunteer dill plant along with some dill sprouts that came from grocery store seeds. I can't tell yet whether any of the cilantro plants have sprouted because the newest sprouts are too delicate for me to sample.


This is my purple globe basil, which, with a little help from the oregano, completely outcompeted the parsley and chives. I think the better herbs won.


This is my sorrel. I am very pleased that it made it through the summer. The tag that came with it said it didn't like the heat. It has sour leaves, and I think they're especially nice in salads with lemon-sesame dressing. The stems are nice in spring rolls. I think there is a traditional Jewish sorrel soup called shav, but we don't have enough to make soup.

And this is my favorite plant. I know that's like having a favorite child, but this is the volunteer basil plant that doesn't appear to be related to any of my other basil plants. It has smaller leaves than my Genovese basil and larger, less-purple leaves than Thai basil or purple globe basil. The taste is more floral than Genovese or purple globe, and I've convinced myself that it has some anise notes. My theory is that it's a hybrid between the Genovese and Thai basils, but it is still mysterious. It also seems to be very hardy, and it has grown like mad since mid-July when it first popped up. Also pictured: a little red pepper (left) and some beet sprouts (right).

Wednesday, October 14, 2009

Experimental Indian night

Last week, we had my old roommate over for an evening of culinary experimentation and playing a card game called Rook. We would like to make "Cook and Rook" a regular occurrence. Jon made peppers stuffed with Indian-spiced lentils and rice, and I tried dosas for the first time. Dosas are thin Indian pancakes made with a batter that uses soaked (instead of cooked) rice and urid dal (split black lentils). You let it ferment for a while and then spread it as thinly as possible and cook it like a crepe. I used Mark Bittman's recipe, but I think I'm going to browse around and look for other ones. I had trouble getting it thin enough, even after adding a lot more water than Bittman suggested. But it was fun to try a new, very different food, especially since it is fermented. I like fermenting things. The filling for the dosas was amazing: potatoes, onions, and spinach spiced with garlic, ginger, turmeric, smoked paprika, cumin, and coriander. The smoked paprika isn't particularly Indian, but it added a lot to the dish.
I enjoyed our experimental night. Usually I am opposed to cooking a new dish for company, let alone something as different (for me) as dosas, but since it was billed as experimental, I wasn't worried about it falling flat. I will probably try dosas again in the not too distant future, and if they work out better, I'll put the recipe up here.

Tuesday, October 13, 2009

Quinoa lentil salad

I made this dish kind of on a whim last Friday to use up some extra lentils we had. We liked it so well that I made up another batch of it this morning before going to school so we could have it for lunch. It is a really quick dish. I think it could definitely become a potluck/picnic standby for me. Although it has a lot in common with my famous lentil salad, it is much subtler. I think of it as lentil salad's sophisticated older sister. We used French green lentils, which might be called de Puy lentils in your supermarket. Regular brown lentils would work fine in here, too. I don't think red lentils would work very well because they get so mushy. According to wikipedia, quinoa is high in protein, fiber, and iron. It also has a pleasant taste and texture, similar to white rice or millet. I used 1/4 red quinoa and 3/4 white for a little color contrast, but I think the taste and nutrition of both kinds is the same.

Quinoa lentil salad

1 cup quinoa
2 pinches salt
1 1/2 cups cooked lentils (from about 1/2 cup dry, I would guess)
1/2 cup fresh herbs, finely minced (I used thyme and oregano, but rosemary, basil, dill, and even mint would probably be nice)
2 stalks celery and some celery leaves, chopped

Red wine vinegar
Dijon mustard
Black pepper
Extra-virgin olive oil

In a medium saucepan, bring quinoa, salt, and 2 cups water to a boil. Lower heat and simmer, covered, for about 20 minutes, or until water has been absorbed. Mix together cooked quinoa, lentils, herbs, and celery. Whisk together a mild vinaigrette from remaining ingredients and dress the salad. I don't include amounts because I wasn't really paying attention when I made it. Just do what feels right.

"Gumbo"

I'm not from gumbo country and didn't grow up eating it, so apologies to those who are and/or did, for this is probably a slap in the face of all that is actually "gumbo". But I call it that because it's faster than "okra bean stew thing". And because Barbara Kafka did in the cookbook whence comes the recipe. This is one of the few meals I make that Jon doesn't love. He's not a fan of tomato-based stews. But I love it. The beans make it hearty and filling. The kale and okra give it a lot of texture. The corn bits are sweet. The roux and chipotle give it a nice smokiness. It's great. I serve it over rice or cornbread. This recipe makes an absurd amount, so it's perfect for serving to friends or freezing for lunch later. As is the case with most spicy recipes on this blog, the heat level is appropriate for me, and I am a big wuss. So feel free to add more chipotles, dried chilies, cayenne, or Tabasco sauce as you see fit. This recipe is a good place to hide leftover or excess veggies you have. I have had zucchinis and yellow squashes lying around that get thrown in there, and I'm sure leftover potatoes, broccoli, green beans, etc. would be good too. It's very flexible.

Vegan gumbo (from Vegetable Love by Barbara Kafka)
Makes about 13 cups, serves at least 8 very hungry people

1/2 cup plus 2 tbsp vegetable oil
1/4 cup all-purpose flour
1 large onion, diced
5 garlic cloves, minced or pressed
1 chipotle pepper in adobo sauce, finely chopped
2 small or 1 large bunch kale, stems removed, leaves coarsely chopped
4 cups canned tomatoes, crushed or diced, with their juice
1 pound okra, cut into 1/4-inch slices (fresh is better, but frozen save so much time that I use them instead)
1 cup fresh or frozen corn kernels
2 cups beans, either canned or cooked from dry, any kind (I usually use kidney or cannellini beans, but anything works in a pinch)
1 cup frozen lima beans
1/2 cup red wine vinegar
Salt to taste
Black pepper to taste

First, make a roux. To do this, heat the vegetable oil in a large pot over medium heat. Stir in the flour and cook, stirring constantly, for 10 minutes or until the mixture begins taking on a lot of color. Lower the heat to medium-low and cook until the roux is a warm brown, like a Hershey's bar. How long this takes is very stove-dependent.
Add the onion to the roux. Remove from heat and continue to stir. The onion should wilt but not burn. When the onion and roux have stopped sizzling, return the pot to medium-low heat. Stir in the garlic, chipotle pepper, and kale. Cook, stirring occasionally, until kale is wilted, about 7-10 minutes.
Add 4 cups of water and simmer for 10 minutes. Stir in the tomatoes, okra, and two cups of water. Bring to a boil. Lower the heat and simmer for 10 minutes. Stir in the corn, beans, and limas. Season with vinegar, salt, and pepper. The salt will depend a lot on how salty your beans and tomatoes were. If you used unsalted tomatoes and beans you cooked from dry yourself, add some salt. Otherwise, I prefer just to add the vinegar and salt it myself at the table. If you can let the soup sit for 30-90 minutes before serving, it will let the flavors meld nicely. But if not, no big deal because you will have leftovers, and they will taste even better the next day.

Tuesday, October 6, 2009

Mung beans and greens in coconut milk

This is a picture from several months ago. That time, we made it with beet greens and served it with beet salad.

This is a great recipe I got out of Sundays at Moosewood Restaurant. I find the Moosewood cookbooks very accessible, and in addition to a lot of tasty, healthy, easy recipes, they have a lot of basic information about beans, grains, and vegetables that is really helpful. Sundays at Moosewood is a collection of various ethnic dishes from several different regions of the world. This recipe is from the Southeast Asian section of the cookbook. They claim it is from the Philippines, but I've never been there, so I don't know how authentic it is. But it's very tasty and filling. I would describe it as comfort food.

I went to the farmers' market on Saturday and splurged on a big bag of sweet potato leaves. I had never tried them before, and the lady said it was the last of the season, so I decided to get them. Any time I get to try a new green, I am happy. Sweet potato leaves are about the size of spinach, although they hold up to heat a little better. I used about half of them in this dish and saved the rest so I could eat them in a more pure form and get to know their flavor better. (In case you're curious, they taste pretty much like any other green, but when you cook them, there is a distinct sweet potato aroma.) The sweet potato greens worked well in this dish, but so do any other greens.

This dish is an example of luxurious, indulgent vegan cooking. Coconut milk is incredibly rich, so you will not feel like you're depriving yourself of anything. In fact, you'll probably want to round out your meal with something light and fresh to balance the richness of this dish. We made more plumcot spring rolls, which fit the bill perfectly. A green salad with a nice acidic dressing would be good too. This is good served over either jasmine or brown rice, but it's good on its own too.

Mung beans and greens in coconut milk
It's almost impossible to have too many greens in this dish, so if you've got a giant bunch of something and no other plans for it, just throw the whole thing in.

1 1/2 cups whole or split mung beans (I prefer whole)
2 tbsp vegetable oil
1-1 1/2 cups chopped onion
4 garlic cloves, minced
1 tbsp minced fresh ginger, optional
1/2 tsp salt
1 can coconut milk
2 tbsp soy sauce
Dash Sriracha or cayenne or some other spicy-maker
3-4 cups greens, chopped (I've used beet greens, chard, red Russian kale, and now sweet potato leaves, all to great effect)

Cover mung beans in plenty of water and bring to a boil. Simmer until the texture is to your liking. 35 minutes is good for me. Drain beans and set aside.
Saute the onion in the oil over medium heat until the onion is translucent, about 4 minutes. Lower the heat, add the garlic, ginger, and salt, and cook for another 4 minutes or so. Add the beans, coconut milk, soy sauce, and Sriracha and simmer for about 5 minutes. Throw in the greens and cook them, stirring occasionally, until they wilt. Taste and add a little more soy sauce or Hoisin sauce if you want.

Monday, October 5, 2009

Fall planting

I have a little garden on my balcony. I started it in March. I plantedherbs, including
dill and
mint. I also planted some vegetables like
tomatoes,
eggplant,
peppers,
lettuce, and
spinach.

Amazingly, most of it has survived for more than six months! I have been meaning to do my fall planting for a while now. The summer plants have mostly stopped producing, and now it's time for plants that can't tolerate the heat. On Saturday, I finally got around to it. Luckily, Houston doesn't have a hard winter, so I think the plants will survive despite my procrastination. I pulled out the remnants of lettuce and tomatoes that had gone to the big garden in the sky and poured new dirt into a bunch of my pots. I planted carrots, kale, beets, and broccoli. I don't know if all of them will make it, but I look forward to seeing their little heads poke up through the dirt in the next couple of days. I also planted some dill and coriander seeds from the spice section of the grocery store. I don't know if they will germinate, but it will be fun if they do. I have a lot of volunteer basil and dill plants that have started poking up in various pots and might be able to hang in there for the long haul. After I finished my planting, there was a gentle rain on and off for the next two days. I think that was a good omen.

Having a garden has really changed the way we cook, especially with herbs. The vegetables were fun but produced small fruits sporadically, so we couldn't base a meal on the tomatoes from our garden or anything. Each vegetable was a treat that we carefully bisected and savored raw. But the herbs have grown very well. I have always enjoyed cooking with fresh herbs, but when you buy them from the store, they usually wilt before you can use them all, so I didn't do it very often. I have gotten so much enjoyment from sprinkling fresh herbs on salads or wrapping them in spring rolls. I learned that I love the combination of carrot and mint. Fresh rosemary and basil are excellent on pizza. They all look beautiful as garnish, and it's lovely to sit on the balcony sipping wine and nibbling on mint and basil.

When I first started my garden, I was pretty sure I was throwing my money away, and I would have been satisfied if any of my plants had lasted a month. I have truly been blessed by the fantastic success of my garden. I love watching the miracle of new life sprouting up before my eyes, and I hope to see those fall sprouts soon.