Showing posts with label dessert. Show all posts

Friday, April 12, 2013

Double Coconut Shortbread

I made Smitten Kitchen's toasted coconut shortbread cookies last year, and I wondered whether coconut oil, another solid-at-room-temperature fat, could replace butter. I finally got around to trying it, and the result was delicious but delicate. The coconut oil gives them a really tender, melty mouthfeel and an incredibly deep coconut flavor.

Both the dough and the finished cookies were quite a bit more fragile than shortbread made with butter. I rolled the dough into a log before refrigerating rather than rolling out and cutting with cookie cutters as in SK's recipe. The dough was much more prone to shattering when I cut it off the log than regular shortbread is. I couldn't cut the cookies as thinly as I normally do for shortbread, which combined with the richness of coconut oil means you really just want one or two at a time, not seven. Whether that's a problem or a benefit is unclear.

After baking, the cookies were very liable to crumble completely, and I'm just eating them off of the cooling rack because they're too delicate to transfer. I'm guessing that there is some mixture of butter and coconut oil that will have the perfect combination of durability and tastiness. If you're in need of a vegan shortbread recipe, this is it. If not, you should try mixing butter and coconut oil for optimal durability.

Double coconut shortbread (adapted from here)

3/4 cup coconut oil, room temperature (or mixture of butter and coconut oil)
1/2 cup sugar
1/2 tsp vanilla extract
generous pinch of salt
1 1/3 cups all-purpose flour
1/2 cup shredded coconut, toasted (the really small kind, about the size of breadcrumbs, not the big flakes)

In an electric mixer, mix together the coconut oil and sugar. Add the vanilla and salt and mix. Mix in the flour and then the coconut until it kind of forms a dough. I had to turn it out onto a cutting board and use my hands to get it to come together all the way. Roll into a log and refrigerate until hard.

Cut cookies onto a pizza stone or cookie sheet. Try to get them as thin as possible without the dough shattering, which for me was between 3/8 and 1/2 inch.

Bake at 325 F for 15-20 minutes or until they look like cookies instead of dough. They won't brown as much as cookies made with butter, in my limited experience, so the usual "golden" cookie instructions don't apply.

Tuesday, March 27, 2012

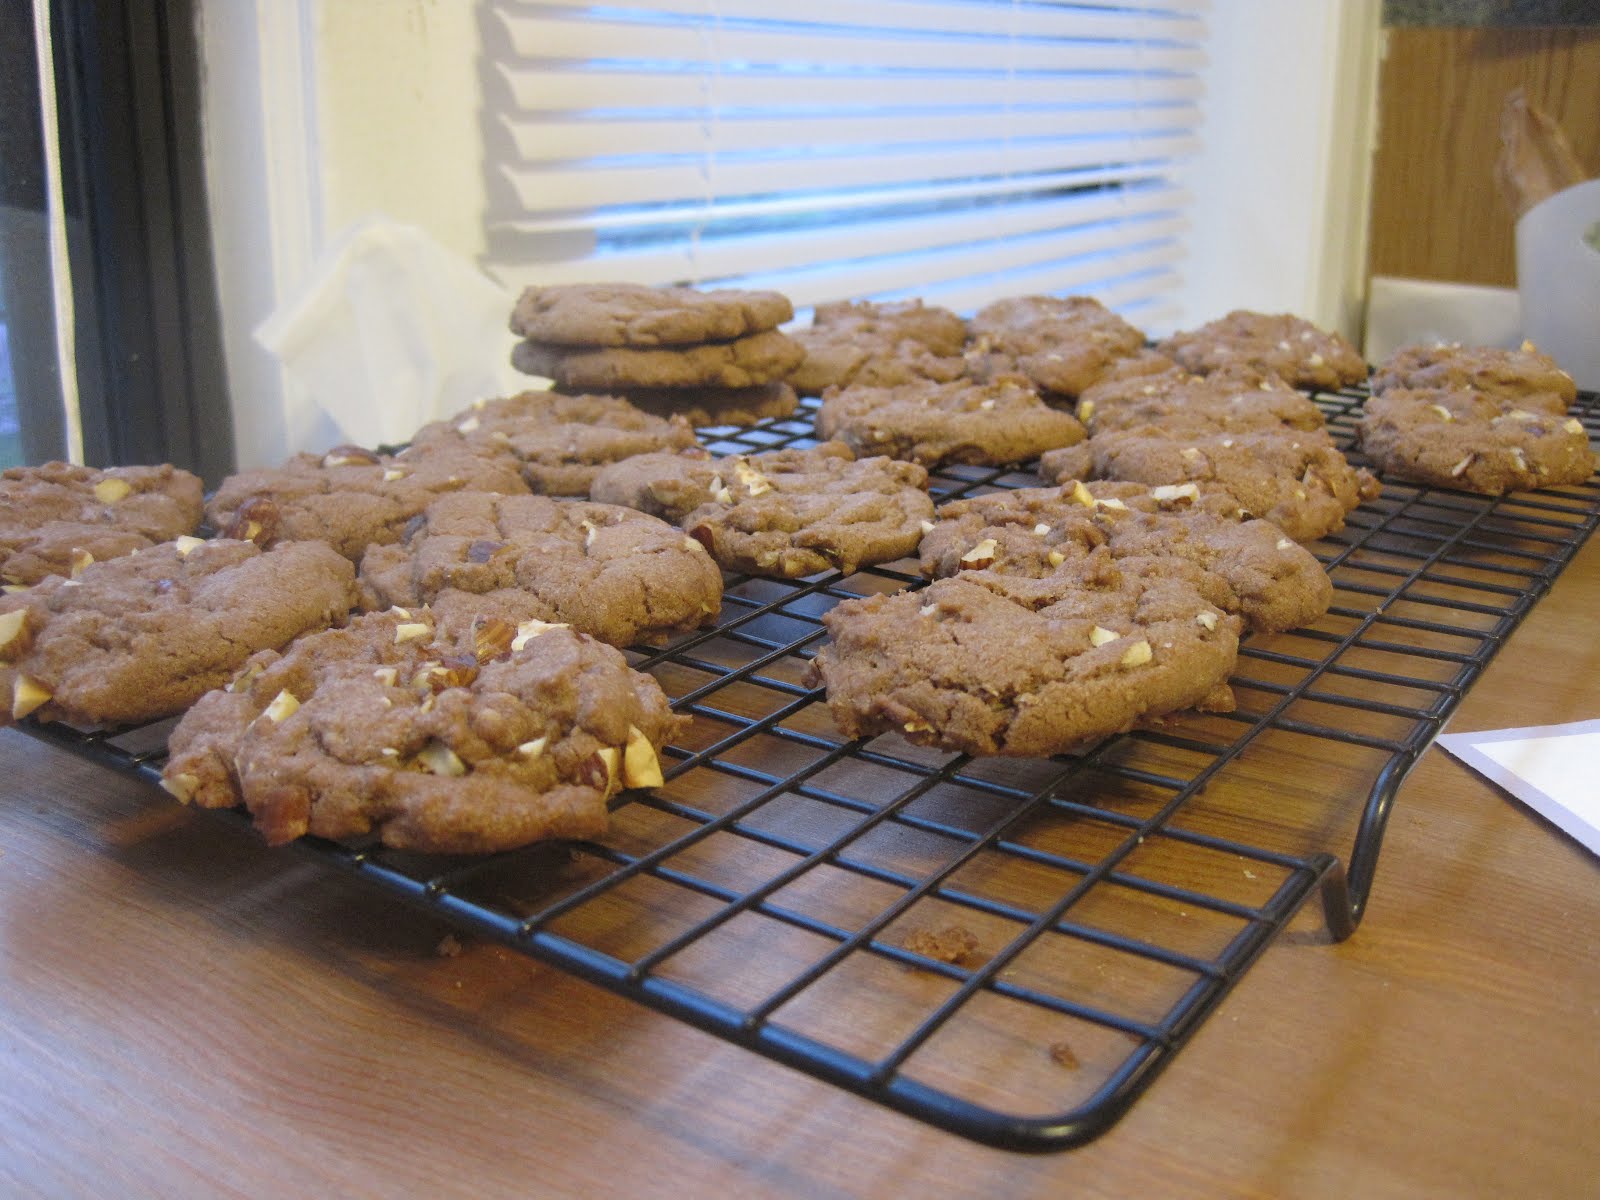
Nutella Cookies

I pinned this recipe a while ago. It's not hard to see the appeal of Nutella cookies. The pin I pinned actually didn't link to the right recipe, so I searched online. Basically the same recipe popped up all over the internet, but I used the one from Kirbie's cravings. I added some chopped hazelnuts to about half the batter, and both Jon and I thought they improved the cookies. So in the future, we'll be including them. The Nutella flavor is subtle but definitely present. I think Frangelico would be a good addition to pump up the hazelnut flavor even more.

Nutella cookies

1/2 cup unsalted butter, room temperature
1/3 cup brown sugar
1/3 cup white sugar
1/2 cup Nutella
1 egg
1 tsp vanilla extract
1 1/2 cups all-purpose flour
1 tsp baking soda
1/4 tsp salt
1/3 cup chopped hazelnuts

Preheat oven to 350 F. Cream butter and sugars until light and fluffy. Mix in Nutella, egg, and vanilla. Combine the flour, baking soda, and salt in a separate bowl and slowly add to the wet ingredients. Mix until just combined. Stir in hazelnuts.
Drop by heaping spoonfuls onto a cookie sheet or pizza stone. Cook for 10-15 minutes, or until the tops of the cookies are starting to crackle a little.

Wednesday, March 21, 2012

Three short breads

I may have mentioned that I'm on a shortbread kick. I'd like to get more comfortable with shortbread ratios so I can start creating my own. Back in February, I made the rosemary pine nut shortbread from 101cookbooks. It was great! The rosemary, lemon, and pine nut flavors all had a chance to sing out, and the texture was crisp and light. It will definitely be made again. I liked it better than the Earl Grey shortbread we've made before, but Earl Grey is still Jon's favorite.
A few days ago, I made two shortbread recipes from The View from the Great Island: peanut butter chocolate chip and double dark chocolate. Both were really good, but they weren't as good in cooked form as raw. Of course, not cooking the dough is easier than cooking it, but it felt kind of naughty to eat raw shortbread dough, despite its lack of raw eggs. These recipes had a higher butter to flour ratio than other shortbreads I've made, and I think it made the cooked texture a little too crumbly. The peanut butter one almost seemed like eating straight peanut butter in the way it stuck to the roof of my mouth. I don't know if I'll make these again. Jon suggests making the dough as "summer cookies" that we can just cut off the log and eat without baking.

Saturday, February 25, 2012

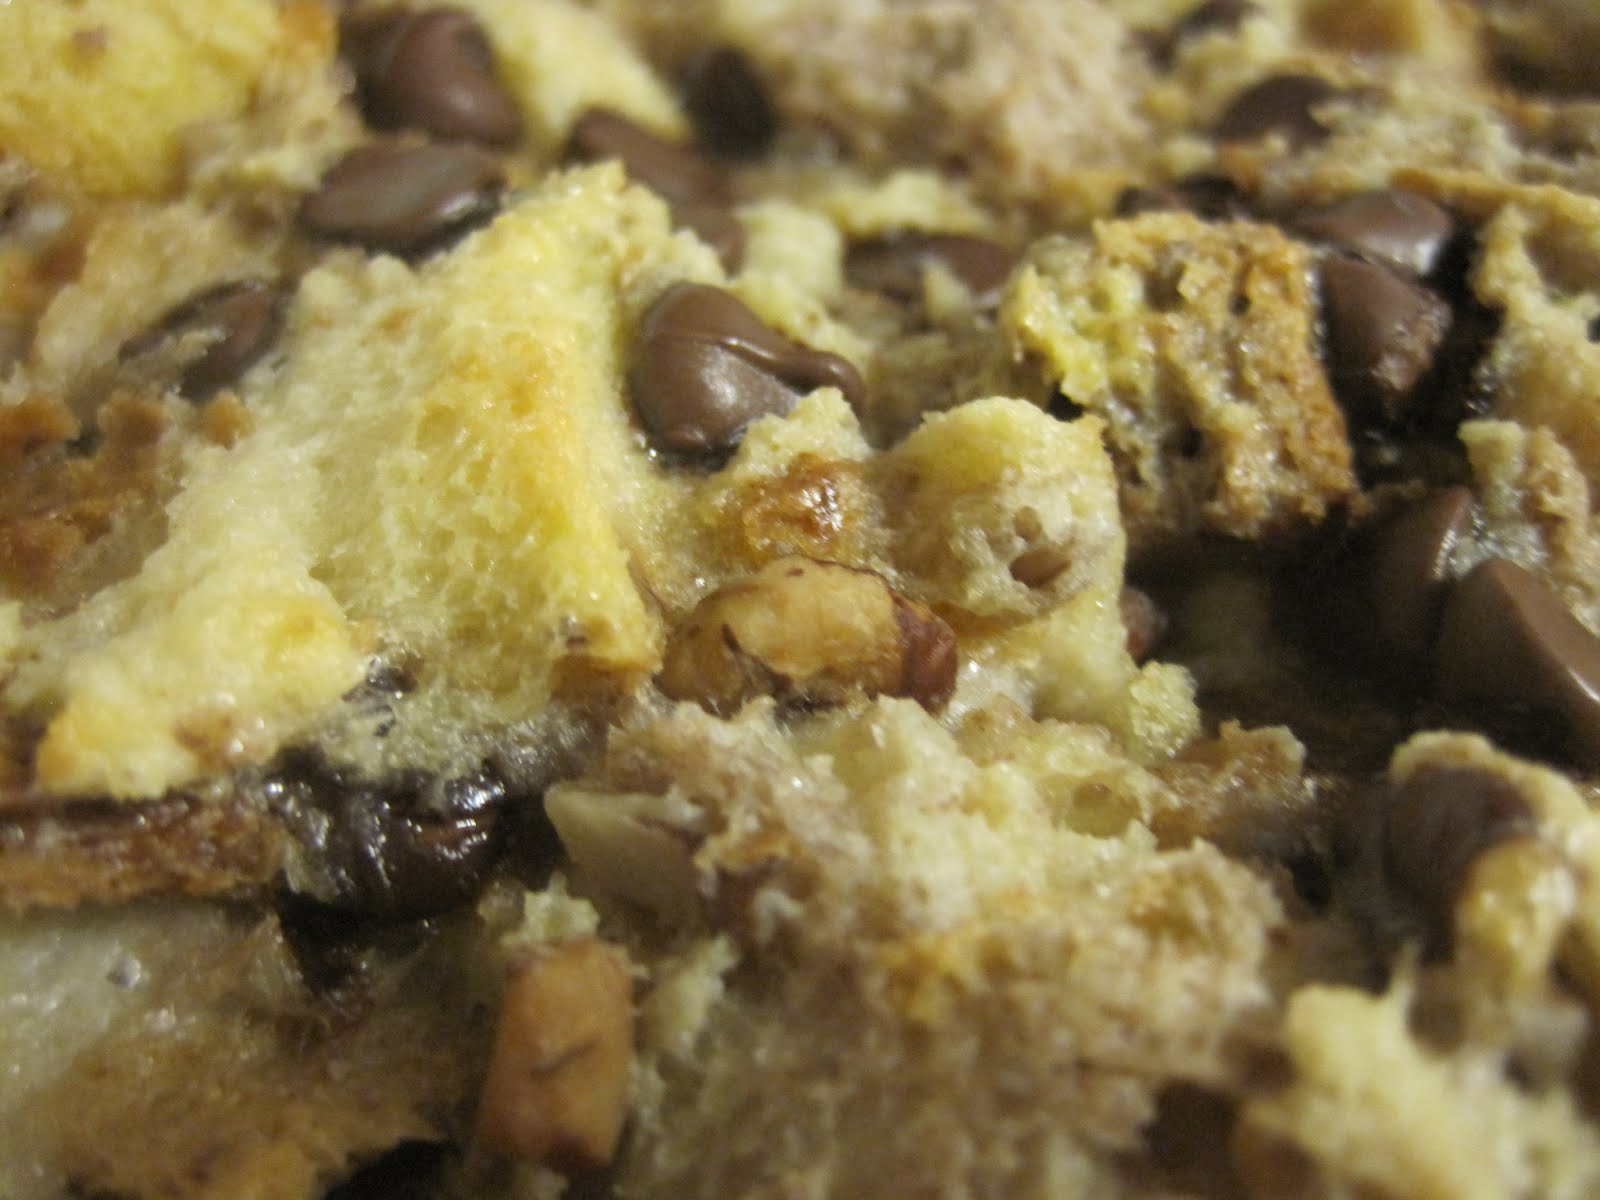
Chocolate chip bread pudding

My friend Katherine sent me a recipe for the pecan bread she uses for French toast. (Side note: she is vegan and uses a chickpea flour batter for French toast. It's awesome.) My bread machine didn't do a good job of distributing the pecans, so the bread was good, but not quite what I was hoping for, so it didn't get completely eaten before it started to get stale. Luckily, there's this awesome little thing called bread pudding. When the bread was all torn up, the pecan distribution didn't matter. I went with a chocolate chip bread pudding, slightly modified from How to Cook Everything Vegetarian by Mark Bittman. It was tasty and held up surprisingly well in the fridge over the course of the week we took to eat it. I think it would be really good with bananas in it too, so we'll probably add them next time.
Chocolate chip bread pudding

3 cups milk
1/2 cup sugar, or more to taste
4 tbsp butter, plus butter for the pan
Bread, enough to fill the pan (we used pecan bread), torn into bite-sized chunks
3 eggs
3 oz chocolate chips or chunks
1/3 cup chopped pecans (I estimate that this is about how many pecans were in there, so you should add it if you aren't using pecan bread)

Put the milk, sugar, salt, and butter in a small saucepan over low heat and warm until butter melts.

Meanwhile, butter an 8- or 9-inch square baking dish.

Put the bread in the baking dish and pour the milk mixture over it. Let it sit for a while, poking it now and then to submerge the top pieces of bread. Stir chocolate chips and pecans into mixture.

Bake at 350 F for 45-60 minutes, or until the pudding is set and a knife inserted into the center comes out clean. (Bittman suggests using a bain-marie, but I forgot to do it, and it was fine.)

Monday, February 13, 2012

Buttermilk bonanza: maple-buttermilk pie

The last recipe of the buttermilk bonanza was a maple-buttermilk pie from 101 cookbooks, and I think we definitely saved the best for last. This pie received a lot of praise from mathematicians in two cities because I made it right before going to UIUC to visit one of Jon's collaborators. I've never made a buttermilk pie before, and it worked perfectly. It's a little tangy, but mostly sweet, rich from the buttermilk and egg yolks, slightly mapley and slightly lemony, and the part-rye flour crust added a little something too. I didn't use either of Heidi's recommended crust methods, just my usual: use pastry cutter to incoroporate fat into flour, add liquid (in this case beer) a little bit at a time until dough comes together, roll our, and transfer to pie dish. Her suggestions are probably puffier and better, but mine is easy and more than acceptable.

I really enjoyed the buttermilk bonanza. It gave me the impetus to try some nice new recipes and get a little more familiar with buttermilk. Plus, I pinned a bunch more buttermilk recipes that I can try the next time I find myself with 8 cups of buttermilk and no plan.

Buttermilk use: 2 cups
Buttermilk bonanza total: 8 cups, and we're out of buttermilk.

Thursday, September 29, 2011

Earl Grey shortbread cookies

This is my second time making this recipe for Earl Grey shortbread cookies. The tea flavor is subtle but nice. I have never been a fan of shortbread cookies, but having a little extra flavor is nice, and I find them much tastier homemade than store-bought. The second time I made them, I changed up the method just a little both to account for the fact that I have a mixer but not a food processor and to make them rolled cookies instead of a log that would then be sliced. The rolling process was pretty time-intensive. I don't know if shortbread is meant to be rolled out, and it was kind of sticking to both the cutting board and the rolling pin. Flouring the pin didn't seem to help, so I'm not quite sure what the best way to deal with that would be, besides just being patient.

I didn't mind taking the time to roll them out since I just got a bunch of cute cookie cutters, as you can see in the above picture. I'm not sure what all of them are. There's definitely a dog, but there's also another one that's either a dog or a sheep. There is a hippo, too. That's nice. The one in the top left is either a foot or a bird that's sitting down. I kind of think it's a foot, so maybe it goes with the shark and umbrella as kind of a beach-themed set.

Earl Grey shortbread cookies

2 tbsp loose-leaf Earl Grey tea
2 cups flour
1/2 tsp salt
1 cup (2 sticks) butter, room temperature
3/4 cup sugar
1 tsp vanilla extract

In a coffee grinder or small food processor, grind the tea until it's not powdered but a bit more broken up than it started. Mix tea, flour, and salt together in a medium bowl and set aside.

Using a mixer or wooden spoon, cream the butter, sugar, and vanilla. Add the flour mixture and stir to combine. Refrigerate until ready to roll out and cut into fun shapes. (Alternatively, you can follow the original recipe's suggestion that you roll the dough into a log, wrap in saran wrap, refrigerate, and cut into discs.)

Bake at 375 for 12 minutes, or until turning golden brown. Allow to cool on the baking sheet a few minutes before transferring to cooling racks.

Wednesday, September 21, 2011

Cucumber-melon rocket pops

This is a work in progress. A few weeks ago, it was pretty hot, and I had half of a delicious melon. I'm not actually sure what kind. It was yellowish on the outside and light green on the inside. It was reminiscent of honeydew, but not quite the same. In any case, it was great: sweet, not too hard or soft, fragrant. We ate a lot of it just as melon, but I also wanted to try a fruit pop with melon. I also had a cucumber that had seen far better days and would have headed to the trash if I hadn't found a use for it. Cucumber and melon are friends, so I cut out the bad bits and added it to the melon. Earlier in the day I had impulse-bought some Tyku liqueur, which has melon and citrus flavors, so I decided to do something similar to the grapefruit-Campari pops I posted back in June. I blended up the melon and cucumber together, added a little sugar and Tyku, and froze them.

They're pretty good. They have a lot more texture than most pops because they're whole fruit rather than juice, and I like the texture a lot, but the mixture separated in the freezer, so the tip of the pop tastes sweet and alcoholic, but the rest of it is milder and has more chunks. I don't know how to keep it from separating, since I think it happens in the freezer before it freezes. Something I would tweak the next time is to add pineapple juice. I think the intense sweet-acid taste would be great with the cucumber and melon. I would probably leave out the alcohol as well. It definitely made a difference, but I don't know if the effect was better than it would have been without the alcohol. I could, however, see this going in the frozen cocktail direction with tequila or gin in place of the liqueur. Anyway, here's the recipe as I made it.

Cucumber-melon pops

2 cups cubed green melon
1 cup cubed cucumber
2 tbsp sugar
1/4 cup Tyku liqueur

Blend melon and cucumber together. Add sugar and liqueur. Pour into popsicle molds and freeze.

Monday, August 8, 2011

Jungle Sundaes

I've never disliked avocados, but the past few months I've been especially fond of them. Mostly, we add them to salads and sandwiches, but I decided to get a little crazy with them last week. The night before, I had made us a really simple banana split. Banana is unusual in that it is a creamy fruit. The next day as I was cutting into the salad avocado, I remembered that avocado was also a creamy fruit, and a delightfully wacky idea took form: avocado sundae! So we tried it that night: half an avocado, roughly chopped up, covered in cookies and cream ice cream, chocolate sauce, and chopped brazil nuts and cashews. Filled with trepidation, we dug into it, only to barely be able to taste the avocado. It tasted as good as any bowl of ice cream with chocolate sauce and nuts, which is to say, good.


Emboldened by the fact that it didn't suck, we decided to decrease the ice cream to get more of the avocado flavor. I scooped half an avocado into a bowl, put two small scoops of ice cream on it, and drizzled, instead of drenched, it with chocolate sauce and brazil nuts. I wasn't hungry that night, but Jon wolfed it down and enjoyed it.


The next time, we decided to combine the creamy fruits and made what we have dubbed the Jungle Sundae:

1/2 banana, 1/2 avocado, 2 scoops vanilla ice cream, chopped brazil nuts and cashews, chocolate sauce.


It's a little big for one person, but so is a banana split. I don't actually know if avocados grow in the jungle. I think of them as coming from California and Mexico. But the other ingredients (bananas, vanilla, nuts, cacao) could come from the jungle, right?

Friday, June 3, 2011

Grapefruit-Campari rocket pops

I have successfully moved from Houston to Chicago, so Jon and I are together again! The weather here has been a bit unpredictable. It was perfect the day I got here, rainy and cold for the next five days, sticky-hot for the next two, perfect again yesterday, and pretty good today, but on the hot/humid side. Our apartment has no air conditioning or fans, and because of the position on the building and the fact that we only have windows on one side, we get very little breeze, so the sticky-hot days were nearly unbearable. It's very strange for me. I am used to being warm, and I even like it. Except for a few days when my mom was visiting, I used no air conditioning in the summer of 2007, which I spent in Houston. But I had a fan and a great breeze coming in over my bed at night. Without those, it's really tough to make it through the summer. So we're going to have to invest in a fan or air conditioning, since we can't do much about the breeze thing.

Until then, we're eating these popsicles to cool down! I based it on this recipe in the most recent Bon Appetit, but I subbed grapefruit for orange juice and omitted the lemon juice altogether. I love grapefruit and Campari, both separately and together, so it seemed natural to me. I froze them in these cute rocket popsicle molds. The recipe made about twice as much liquid as the molds could take, so I still have some in the fridge for when we've eaten more pops. I had six molds, and they hold a little over 1/4 cup each, so if you make them, you might want to halve the recipe. The next time I make these, I might omit the simple syrup altogether. The pops are pleasant as is, but I have a high tolerance for bitter flavors, so I might like them without the sugar.

When I was a kid, my mom was the queen of juice popsicles. I think she used concentrated fruit juice and reconstituted it to about double strength and froze them in these great molds that had sippy straws at the bottom so as it melted, you could sip the juice out. The rocket molds lack that important feature. Getting out the last bit of juice invoves more contortions and has a high probability of a sticky face. I don't know how many popsicles she made every day during the summers. There were three kids, our friends, and my dad, who is quite the frozen dessert lover. I think she had at least four sets of six molds, and she probably went through them all several times a week, trying to keep us in somewhat-healthier-than-sugar-water popsicles.

Grapefruit-Campari pops

1/3 cup sugar
1/2 cup water
1 3/4 cups grapefruit juice
1/3 cup Campari

Bring the sugar and water to a boil in a saucepan over medium heat, stirring to dissolve sugar. Refrigerate syrup until cold. When cold, combine all ingredients, stir, and pour into popsicle molds. Freeze until frozen (ours were not quite ready at the four-hour mark, but we ate one anyway).

Thursday, May 12, 2011

Jasmine tapioca pudding

This rather unphotogenic pudding is like eating bubble tea: milk, jasmine tea, and tapioca. I saw the idea in a cookbook but based the recipe on the back of the box of tapioca. I was trying to use the last of the tapioca before my move (in just eight days!), so I added about twice the amount of tapioca, and it was definitely too congealed. The recipe below reflects what I think would be a better ratio. I found the jasmine taste to be a little strong and soapy the first day, but it mellowed as it aged, and it's really nice a few days later.

Jasmine tapioca pudding

2 3/4 cups milk
3 tbsp loose jasmine tea
1/4 cup minute tapioca (or quick-cooking, not the stuff you have to soak overnight)
1/3 cup sugar
1 egg, beaten

Bring milk and tea to steaming point (probably around 180 F) in a medium saucepan. Turn off heat and steep for ten minutes. Strain and discard tea leaves.
Combine milk, tapioca, sugar, and egg in saucepan again. Let sit for five minutes. Turn heat to medium and cook, stirring constantly, until mixture comes to a rolling boil. Remove from heat and eat warm, room temperature, or chilled.

Wednesday, September 8, 2010

Jus Alpokat

As I mentioned in my post about Singapore, one of the great things I got to try there was jus alpokat, a delicious avocado-based beverage. It was described as Indonesian avocado juice, but it is basically an avocado milkshake. It was a great treat, although it's very rich, and usually the whole glass was too much. My birthday was on Monday, and I decided I wanted a yummy meal reminiscent of my time in Singapore: jus alpokat and curry laksa. (I'll post about the curry laksa later. It was great.)

I looked online for jus alpokat recipes and decided to use a kind of consensus. Some use milk and sugar, some use milk and simple syrup, and some use sweetened condensed milk. The one below uses milk and sugar because it seemed easiest. I loved it. Jon liked it at first, but it was too much for him as he kept drinking it, so I ended up getting to have some the next day as well. The amount below was advertised as making two servings, but it's so rich that it's probably better to split it four ways. Avocado is great in sweet things, and I definitely recommend trying this. I am eventually going to try a vegan version with coconut milk. I think it could be good.

I couldn't find my camera when I was making these, so I used my laptop instead. The pictures kind of freak me out because of the mirror image thing. My kitchen doesn't look like that! My left front tooth is behind my right one, not the other way around! (Yeah, I know I always see myself in the mirror like this, but I'm not used to pictures of me looking like this.)

Jus alpokat

1 1/2 large avocados
1 cup milk
Sugar to taste (about 2 tbsp)
Chocolate syrup
Ice

Scoop avocado flesh into blender. Add milk. Blend until smooth. I used the "blend" setting at first and moved up to "liquefy," the fastest setting, after it had gotten pretty blended. Add sugar to taste and blend again. To serve, pour chocolate syrup onto the sides of 2-4 glasses. Spoon the avocado mixture into the glasses. Without washing blender, place ice cubes into blender and pulse a few times to crush. Top each glass with crushed ice. Eat a little of it immediately because it has a great texture and it's avocado flavored, and then mix the rest into the beverage.

Monday, August 30, 2010

Yogurt ice cream


Jon and I made two batches of ice cream this weekend! Both were great. The first one was Jon's choice, lemon ice cream. It turned out really well, but the second one, a yogurt ice cream recipe from last September's Bon Appetit, took the cake. It also keeps a really great texture even after being frozen, something some homemade ice creams, like our lemon one, don't do as well. I would post the lemon ice cream recipe, but I'm going to hold off in case we refine it. The yogurt ice cream needs no refinement, although Jon thinks it would be better with another flavor, maybe lemon or blueberry, in it. I say he's crazy. It is rich, sweet, and slightly sour.

Yogurt ice cream
The Bon Appetit recipe calls for Greek yogurt. I used my own homemade yogurt and drained it until it was about 2/3 of its original volume.

1 cup whole milk
1 cup heavy cream
3/4 cup sugar, divided
3 egg yolks
1 cup thick yogurt

Combine milk, cream, and 1/2 cup sugar in a medium saucepan. In a heatproof bowl of volume at least a quart, combine egg yolks and remaining 1/4 cup sugar.

Over medium heat, stir milk and cream mixture until all sugar has dissolved. Slowly pour milk mixture into egg yolk mixture, whisking to combine. When all the milk has been stirred in, pour entire mixture back into saucepan.

Over medium heat, stir constantly until mixture reaches 170 degrees or coats the back of a spoon. Remove from heat, pour into bowl, and allow to come almost to room temperature. Stir in yogurt.

Chill until chilled, then freeze in an ice cream maker according to manufacturer's directions.

Wednesday, July 7, 2010

Peach pie

We're back! We were in France and Germany again for a month this year. Then we got back to Texas, almost immediately flew to San Francisco for Jon's brother's wedding, and just got back here on the fourth. We are still settling in and getting re-adjusted to Houston. I started a short summer teaching stint on Tuesday, so we will get a lot of Jon recipes in the next couple weeks. I hope to do a post soon about the good stuff we ate in France, but for now, here's a great American dessert.
When I was a kid, my family had two or three peach trees, two apple trees, and a pear tree that produced copious amounts of fruit in the summer. My mom would put up tons of applesauce and peach jam, but the pies were the best. She made dozens of them every summer and froze them. When a family moved into the neighborhood or a friend had a baby, got sick, or had a death in the family, she would take a pie over. We also ate a lot ourselves throughout the year.

This week, perfect, ripe peaches from Fairfield, Texas were only 0.88/pound, so I decided to make a pie. They had been pretty picked over and a lot of them were bruised or squished, but I knew they would make a great pie. So often, the peaches we get at the store are hard and flavorless, so I'll take a squishy, oozy, delicious one over those any day. I didn't get back from the store with my peaches until 9 pm, but they were so ripe I knew they wouldn't wait, so I whipped up a late-night pie.
The remains of the peaches we used plus some we didn't end up needing.
Peach pie
You can also make this with partially thawed frozen peaches. Let them sit in the sugar-flour mixture a little longer and add about 20 minutes to the baking time.

8 generous cups sliced ripe peaches (about 11 medium peaches), no need to peel unless you're picky or the skin is clearly damaged or undesirable
1/4 cup flour
Scant 1/2 cup sugar
2 pie crusts
1 tbsp almond milk
Sugar and cinnamon for dusting the top

Put sliced peaches into a large bowl. Sprinkle flour and sugar on top and stir together. Let sit while you run to the store because you realize you forgot the flour (or at least 20 minutes). Transfer one crust to the deepest pie dish you have. Spoon peaches into crust. Top with 2nd pie crust. Trim around edges and crimp if you're fancy like that. If you've got extra crust, you can roll it out and cut it into shapes. (I put "E+J" on the top, but I didn't realize how large the E had been when I cut out the J, so I look very egotistical.) Brush the top with almond milk and sprinkle with sugar and cinnamon. Slash some vents in the top to let the hot air out. Here is the pie before baking.
Place pie on a baking sheet to catch any bubbling juices that might otherwise fall to the bottom of your oven and burn. This is very important because it will happen. Put foil around the edges of the pie, leaving a hole in the middle, so the edges won't burn. Bake at 375 for about 40 minutes. Remove foil and bake about 20 more minutes, until crust looks done. We were too tired to eat any pie when it came out, and it looked like there was no danger of it burning, so I turned the oven off and left the pie in it until the morning. It made a great breakfast!

Sunday, March 28, 2010

Chocolate sweet potato torte

This is the third dessert we served at our pre-wedding dessert party. I got the recipe from Vegetarian Times, but I modified it a little. The biggest change I made was reducing the sugar by 1/3. Everyone agreed that it was sweet enough this way. The sweet potato flavor is pretty subtle, and you won't be able to taste it in a bite containing any of the chocolate topping, but it definitely makes a difference in the texture. As far as I can tell, this lasts indefinitely in the fridge. And it's gluten-free.

Chocolate sweet potato torte

1 cup sugar, divided
1 cup cooked sweet potato, mashed
1 cup almond flour
1/2 cup unsweetened cocoa powder
1/8 tsp salt
4 large eggs (three separated)
2 oz bittersweet chocolate (I used one square of unsweetened baker's chocolate and one square of semi-sweet)
2 tbsp milk or soy milk

Spray nonstick cooking spray on a 9-inch pie dish and preheat the oven to 375.

Blend sweet potato, 1/2 cup sugar, almond flour, cocoa powder, and salt in a food processor until smooth. Add three egg yolks and one whole egg and pulse to combine. Transfer to mixing bowl.

Beat three egg whites in electric mixer until they hold soft peaks. Add remaining 1/2 cup sugar and beat until it holds stiff peaks.

Fold 1/3 of egg whites into sweet potato mixture with spatula. Gently fold in remaining egg whites. Pour batter into pie dish and bake for 45 minutes or until toothpick inserted in the center comes out clean. Allow to cool, completely.

Fill a small saucepan about 1/3 with water. Place a glass mixing bowl on top and turn heat to medium. (Note: this is my version of a double boiler. It might be terribly unsafe, but it works for me.) Put the chocolate into the bowl. Stir as it melts. You might have to adjust the heat if the boiling gets vigorous. When the chocolate has melted, stir in the milk or soy milk. Spread chocolate over top of torte. Let stand until chocolate sets.

Monday, March 22, 2010

Cranberry-Pecan delight

We had a little dessert party with family and a few friends the day before our wedding. We provided three desserts, and other people brought things, too. Of course, one of the things we made was this plum cake, and I can't resist showing off a couple pictures of it because I really worked hard to make it pretty this time.

One of the other desserts we made was this cranberry-pecan-cream dessert my mom used to make a lot when we were little. It's pretty simple, but you do need a food processor and something to whip cream with, so it's a bit messy and loud. Unfortunately, I didn't take as good a picture of it (and it was frozen at the time, so the texture in the picture is misleading), but rest assured that it's quite pink and pretty and smooth and fluffy. I have only ever eaten it as a mousse-like dessert, but Mom also uses it to frost cakes sometimes, in which case she uses a little more whipped cream. There's a rather large range in amount of cream you can use for this. Of course, the cream tempers the tartness of the cranberries, so pick an amount you think you'll like and see how it goes. I've made it a lot of different ways, and it's always good.

Cranberry-pecan delight

1 bag cranberries, thawed if frozen
1/2 cup plus 3-8 tbsp sugar, divided
1 cup chopped pecans
1-2 cups whipping cream

In a food processor or blender, combine cranberries and 1/2 cup sugar and chop coarsely. Add chopped pecans. In a large bowl, whip cream along with 3-4 tbsp sugar per cup of cream until it holds stiff peaks. Combine cranberry mixture with whipped cream. It's OK if you combine them incompletely. The red and white ribbons look pretty.

Monday, December 7, 2009

Unresolved raspberry-rhubarb pie

This past Saturday was the annual Houston Sacred Harp singing. (You can read about Sacred Harp at this website.) It was snowy all day Friday, so I spent most of the day inside cooking in preparation. (Part of the Sacred Harp tradition is serving dinner on the ground to guests who have come from out of town.) This is one of the dishes I contributed. Since I had a little crust left over after putting it in the bottom of the pan, I made a treble clef and some shape notes (explained on the Sacred Harp website) out of the extra and put it on the top. I think of rhubarb as a spring or summer pie, but I had a bag of frozen rhubarb and remnants of a couple bags of frozen raspberries in my freezer, so I didn't have to go out and buy anything to make this pie. And I got a bonus of extra room in my freezer. This pie recipe won third place and "most creative" in a Pi Day pie contest last March. I made it up because one bag of rhubarb isn't quite enough fruit for the Better Homes and Gardens Cookbook rhubarb pie recipe, and I happened to have just enough raspberries in the freezer to round out the volume the first time I made it.

I call this pie unresolved because the notes I have on it, "fa, sol, la, mi" are the equivalent of "F, G, A, B" in C major, hence an unresolved leading tone. For the record, I did made two fa's, but only one would fit on the pie, and if I went down to the next line, I'd have to make another clef for it to make any sense. I didn't think about the fact that I could put the fa at the end and get "G, A, B, C" and a lovely resolution. And yes, I have spent quite a bit of time thinking about this. It's what I do.

Raspberry-rhubarb pie
1 pound frozen rhubarb (about 4 cups)
2 cups frozen raspberries
1/2 cup sugar
1/3 cup all-purpose flour
1 pie crust, made with either all-purpose or whole wheat pastry flour
splash of milk
tiny amount of sugar

Place fruit in a large bowl. Let stand for about 45 minutes, or until icy but not frozen. (During this time, you can make your pie crust if you haven't already.) Stir in sugar and flour.
Place pie crust in pie dish. Trim any overhanging edges and cut them into fun shapes if you want. Pour fruit mixture into pie crust. Arrange fun shapes on top. Brush with milk and sprinkle with sugar for extra beauty and crunch.
To prevent the edges from burning, place aluminum foil around the edges. Bake at 375 for about 50 minutes. (If using fresh fruit, only bake for 25 minutes.) Remove foil and bake for another 20-30 minutes, or until filling is bubbling at the edges and crust is golden. Cool on a wire rack.

Friday, August 28, 2009

Blueberry-thyme frozen yogurt that is almost awesome

The new HEB had blueberries at an amazing 97 cents a pint last week, so we bought three of them. I had been wanting to try to make frozen yogurt, and I thought blueberry would be a good flavor for that. I didn't want to use any sugar, so I decided to add an herb flavor to make it a little more sophisticated. A quick taste test on the balcony showed that thyme was the right herb for blueberries.
I think I've gotten a little cocky lately. Most of my recent culinary experiments have been smashing successes (chickpea flour crackers, red pepper-tangelo sherbet, eggplant basil, oversalted kasha stirred into scrambled eggs, etc.), so I decided I didn't need no stinkin' recipe or any guidelines for making frozen yogurt. I made up a recipe, using just a tiny bit of sugar, and froze it. Unfortunately, it didn't freeze very well in my little ice cream maker, so I had to put it in the freezer for a while, take it out and crank it, etc. After eating dinner, we dug into the yogurt, and it was great. It was pleasantly tart, the blueberry flavor was rich, and the periodic bursts of thyme flavor were lovely. Next time I might steep the thyme in simple syrup to increase both the sweetness and the thymey-ness, but overall it was very nice. After we ate our dessert, we froze the rest like we usually do.
Unfortunately yesterday when I got it out to have some, it was as hard as a rock. I'm sure it would have softened in time, but I had to leave again before it was soft enough to eat. I was able to scrape a few spoonfuls off the top, and they were quite tasty, but I couldn't get very much. I have some theories on what went wrong and how I might fix it next time.

1) I didn't use much added sugar or fat, which lower the freezing point, so the mixture is too much like ice. To fix this I can add more sugar and maybe some cream next time, or use thicker yogurt, which has more fat and less water.
2) The way I froze it, taking it in and out of the freezer, didn't incorporate enough air into the mixture, so it froze too solidly. To fix this, I can make sure the freezer isn't too full and the little cannister that's supposed to go in there gets cold enough. I can also try to whirl it in the food processor and see if that breaks it up and adds some more air.

Have any of you had this problem, or do you know more about frozen dessert science than I do? Any tips would be welcome.

Blueberry-thyme frozen yogurt
1 1/3 cups fresh blueberries, rinsed
2 tbsp fresh thyme leaves, thick stems removed
1 tsp sugar
About 1 cup plain yogurt

Puree blueberry, thyme, and sugar. Pour into 2-cup measuring cup and add enough yogurt to equal 2 cups total. Mix thoroughly. Freeze in ice cream maker according to manufacturer's instructions.

Tuesday, August 18, 2009

Frozen raspberry mousse

I have been having a lot of fun with desserts lately. This was in the July 2008 Bon Appetit. I made a couple modifications, decreasing the sugar quite a bit and using frozen instead of fresh raspberries. I can get frozen ones for $2.79 a pound, while fresh are $3.99 per 4.4 oz. This mousse is good. We ate the first cup right after mixing it up, and it's just as good thawed as it is frozen. I stand by the decrease in sugar, and I might even decrease the cream next time too (or, equivalently, increase the raspberries). It is very rich. Kirschwasser, a clear cherry brandy, really makes a difference. I was dubious because 1 tbsp is so little, but I could tell it really made the flavors pop. That said, if you don't have any, just add a little orange or lemon juice or water to make it blend more easily. I'm sure it will still be delicious.

Frozen raspberry mousse (adapted from Bon Appetit)
2 1/2 cups frozen raspberries, mostly thawed
1 cup powdered sugar
1 tbsp kirschwasser
1 1/2 cups heavy whipping cream
1/3 cup sour cream

Place raspberries, sugar, and kirschwasser in a blender and blend until very smooth. In a large bowl, whip heavy cream with an electric mixer until it holds stiff peaks. Add sour cream and beat just to combine. Gently fold in raspberry puree. Don't worry if you don't get it all the way blended. The little white ribbons are pretty. Eat some now if you want. Pour the rest into parfait glasses (I used a combination of wineglasses and teacups) and freeze. I used 6 glasses and put a hearty 6-oz helping in each glass. Let it thaw in the fridge for a couple hours or on the counter for 20-30 minutes before eating.

Jon demonstrates the proper way to clean the mixing bowl:


Friday, August 14, 2009

Plum Cake "Tatin"

I don't have a TV, so I don't normally get to watch the Food Network. But when I was at a math conference in Connecticut, I got to see a couple entire episodes of Barefoot Contessa. She made this cake in one of them. It is my understanding that a tarte tatin is a caramelized apple tart baked with the crust on the bottom. This has cake instead of pie crust and plums instead of apples, but it's the same idea. My pictures aren't good, but this recipe is. The fruit, which cooks on the bottom of the pan, is sweet and moist and infused with caramel flavor. If I were to do one thing differently, I would squeeze more plums in the bottom because they are the highlight of the dish. There is a good chance that visitors to my house will get this for dessert. I also plan to try it with different fruit. I think apricots would be fantastic. If anyone ever has an Iron Chef: Plum party, I will win every prize.

Plum Cake "Tatin" by Ina Garten
6 tbsp unsalted butter, room temperature, plus extra for greasing the pan
10-12 plums, preferably "prune" plums, cut in half and pitted
1 3/4 cups white sugar, divided (1 cup plus 3/4 cup)
2 large eggs
1/3 cup sour cream
1/2 tsp grated lemon zest
1/2 tsp vanilla extract
1 cup plus 2 tbsp all-purpose flour
1/2 tsp baking powder
1/4 tsp salt
Confectioner's sugar for dusting, optional

Grease a 9-inch pie or tart pan generously with butter. Place plums, cut-side down, in the bottom. Combine 1 cup sugar and 1/3 cup water in a small saucepan. Cook over high heat until sugar is 360 F. It should be a warm amber color. As tempting as it is, don't stir the pan. Just swirl it gently. Pour evenly over plums. It will bubble and hiss and eventually harden. Don't worry. It will turn liquid again when you bake it. It should look like this:
While the caramel is setting, combine butter and 3/4 cup sugar in a medium mixing bowl and cream until light and fluffy. Beat in the eggs, one at a time. Add the sour cream, zest, and vanilla and mix until combined. Add the flour, baking powder, and salt. Stir until just mixed. Pour the batter into the pan and bake at 350 F, until a tester inserted in the center comes out clean. Let cool 15 minutes if you can stand it. Then invert onto a cake dish. If a plum sticks to the pan, gently cajole it out and replace in the top of the cake. Sprinkle with confectioner's sugar if you want.

Monday, August 3, 2009

"Healthy" oatmeal-chocolate chip-pecan-dried cherry cookies

I got this recipe from my mom. One of my aunts lives in Michigan and sends us big bags of dried Michigan cherries every year. They're nice and tart, great in oatmeal, granola, and these cookies. They're also good eaten right out of your hand, which is how we eat a lot of them. I call the recipe healthy because it has whole-wheat flour, not much sugar, whole oats, dried fruit, and nuts. It also has two sticks of butter, hence the quotation marks. It's sure tasty, and it must be healthier than cookies with a ton of butter and none of the good stuff. At least that's what I tell myself. The batter has so many "goodies" that it barely sticks together. Consequently, you don't have to cook it for very long. As you might be able to tell from the picture, I just barely burned the first batch.

"Healthy" oatmeal-chocolate chip-pecan-dried cherry cookies

1 cup butter, softened (two sticks)
1 cup brown sugar
2 large eggs
2 tbsp milk
4 tsp vanilla extract
1 1/2 cups whole-wheat flour
1 tsp baking soda
2 tbsp cocoa powder
2 1/2 cups oats (I use old-fashioned, but quick-cook and instant are fine too)
12 oz chocolate chips or chunks
1 cup chopped toasted pecans or walnuts
1 cup dried cherries or raisins

Cream together the butter and sugar. Add the wet ingredients and mix thoroughly. Add the flour, baking soda, and cocoa powder and mix thoroughly. Add the oats, chocolate chips, nuts, and cherries or raisins and combine. Bake at 350 F for 8-10 minutes. They will continue to cook a little when you take them out of the oven, so err on the side of undercooked.